Showing posts with label masak guna resepi. Show all posts

Wednesday, May 20, 2020

Recipe: Dates Froyo | Frozen Yogurt Kurma

Assalamualaikum dan salam sejahtera diucapkan kepada semua warga Malaysia, sedih ke tu tak dapat balik beraya?  Aku happy gila ye hawau sebab tahun ni aku tak payah nak jadi kuli cuci pinggan.  Orang datang rumah aku cuci pinggan, pergi rumah orang pun aku kene cuci pinggan, kejadah ya anat.

Tahun ni rumah aku close house dan aku dah warning mak aku siap2 tak payah nak keluar beraya.  Jadilah rakyat yang bertanggungjawab, anggap lah kita ni semua pembawa COVID19, makanya kluster raya (mengikut kawasan) dapat dielakkan.  Jangan buat-buat lupa ya, warga emas dan kanak-kanak adalah high risk jika terkena jangkitan COVID19.  Biar tak beraya bersama, jangan kau pulak jadi penyebab kematian orang sebab sebokkkkkkkkk sangat nak beraya kan.  

----sekian amukan----

Image source : Google 
So harini aku dapat hidayah nak share dengan korang recipe paling simple dan jugak salah satu cara utk nak elak kurma berkotak-kotak yang segala specis kurma kau beli tapi tak makan tu kan daripada berulat.  

Hidayah ni aku dapat semalam, sebab mak aku bawak balik banyak gila kurma.  Dah la aku serabut dengan pisang orang sedekah pun aku tak habis goreng jadi aku try la bedal recipe froyo kurma ni pulak.  Tak sangka pulak la menjadik halaaaaahhhh see my level.

Tools needed;
1) Blender / food processor
2) Tupperware mak kau
3) Measuring devices?


Bahan dia simple, benda yang memang dah sedia ada kat rumah;
Note: ni portion untuk satu bekas tupperware standard tu.

1) Buah kurma of course - 6-10 bijik buang biji, potong kecik2
2) Full cream milk / any susu - 1 cup
3) Yogurt - 3-4 tablespoon
4) Vanilla essence - 1 teaspoon
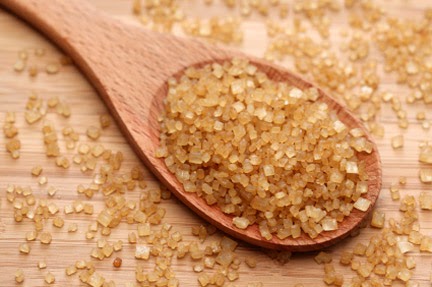
5) Brown sugar - 1 tablespoon
6) Cinnamon powder - 1/2 teaspoon

Cara -cara;
1) Masukkan semua 6 bahan kat atas ni dalam blender, lepas tu kau blend sampai puas hati.  Make sure kurma dalam tu semua dah hancur.  
2) Masuk dalam tupperware mak kau
3) Freeze

Tu cara orang malas, kalau kau terlebih rajin ada cara lagi complicated sikit;

1) Sebelum blend tu, rebus kurma, brown sugar dan vanilla essence tu dalam susu so kurma tu lembut sikit dan at the same time dia absord skali sugar and vanilla tu.  Lepas tu set aside sampai temperature dia jatuh jadi room temperature, baru la kau blend dgn bahan yang lain.
2) Churning the froyo.  Laaa kejadah apa churning tu, ok dia cemni kalo kau ada ice cream machine, kerja kau dah setel dah, lepas blend kau bagi je machine tu setelkan kerja kau.  Kalo takde mcm aku, every 2 hours kau keluarkan froyo yang separuh beku tu then kau kacau dan gaul, masukkan balik dalam freezer.  Repeat ni dlm 5-6 kali with every 2 hours interval.  Motive dia supaya froyo kau tu mcm soft bila makan, takde la mcm ais batu masa cedok tu.  

ok tu je bye.

Check our my other recipes: 

Tuesday, September 11, 2018

Recipe for Noobs | 5 dollar mushroom risotto

Credit: Image from Google

Hey all!  Today I will be sharing my easy mushroom risotto recipe and evidently would cost you less than 5 bucks.  The trick is to NOT make it using arborio/risotto rice.  So NO rice okay.  Kau bukan chef pon, kau noob je bahaha!

Use a far more clever and simpler alternatives such as pearl barley or wheat corn.  Senang cerita bijik barli atau bijik gandum la.  Kau cari je kat Giant mesti ade sepeket dalam RM2 jer.  

Okay why I recommend to use these two as substitute?   Sebab senang kau rebus je sampai kembang.  Bila dah kembang that's all, tak payah kau nak buat kerja renyah masak arborio rice tu pakai chicken stock la, veggie stock la.  Kau masuk je dalam periuk, letak air, pasang api, pegi tengok tv.  Sekali sekala check jugak la, kalo air dah kering tapi belum kembang kau tambah je air lepas tu sambung tengok tv okay.

Actually cara dia mcm kau masak nasik goreng je pon.  Ingredients je hispter sikitlah.

This recipe fits for 2-3 servings.

Ingredients;

  • 1 cup or barley/wheat corn, boiled and strained
  • 4-6 cloves of garlic
  • 1 shallot (bawang kecik, bedal je lah bawang ape pon)
  • 1/2 teaspoon of cajun pepper
  • 1/2 teaspoon of paprika
  • Salt
  • Black pepper
  • Fresh basil
  • Fresh thyme
  • 1 cup of Mushroom (any type but Shiitake or Button would be nice)
  • 1/2 cup of grated Parmesan cheese (or any that you have at home)
  • 1.5 tablespoon of Butter


How to:

1) Boil barley/wheat corn until cooked.  Then strain.  Put aside.

2) Cut everything;
- smash the garlic and cut into little pieces
- dice the shallot
-roughly chop the basil and thyme
- roughly chop the mushroom

3) Heat your frying pan, melt the butter until a little bit golden then stir fry together the garlic and shallot.  

4) Add basil and thyme and stir until the leaves wilt.

5) Add in mushroom, salt, pepper, cajun pepper, and paprika.  Stir and let them cook together until the mushroom wilt and you can see some additional water (that is the mushroom stock) in site the pan.  Yes it is important to let the shroom to fully cooked.

6) Add in the strained barley/wheat corn in side the pan and stir well.  Add in some grated Parmesan until fully coated.  If you see the dish is too dry, just add a little bit of water.

7) You're all set and done!

Good luck.
Periuk jangan lupa basuh.


Thursday, July 28, 2016

Simple Granola Recipe with tutorials


What you'll need:

-1 cup of plain rolled oats
- 2 table spoons of butter
- 2 table spoons of honey
- 1 pinch of salf
- 1 dash of spice (paprika)

Optionals:

- dried fruits 
- chopped nuts
- marshmallows
- chocolate chips 

Tutorial:

1. Heat up your pan and melt (all) butter.


2. Until it sizzles like this.


3. Then add (all) honey and stir thoroughly until the mixture incorporate together.


4. Continue stirring until the mixture boils and caramelized.


5. Add a pinch of salt and stir well.


6. Add in all the oats.


7. Fold until every grain are coated with the mixture (they will turn shiny when fully coated).


8. Heat up a bit with a dash of paprika and continue stirring until all fully coated.


9. Flatten the oats and leave them to get toasty for 5-10 minutes depending on how dry and dark you want it to be.


10. Put in a dry clean air tight container and flatten them up.


11.  Let cool and cover.  


Enjoy!!!

Tuesday, June 24, 2014

Resipi Bubur Jagung / Creamy Corn Dessert Recipe


Hey crazy eaters!!!!  I'm back again with another tutorial of my favorite dessert.. Actually when I was young I hated this dessert so much, but then I just wanna try to make it and thus the love begins..  But I'm never gonna eat it unless I'm the one who cooked it..  I just don't know why -.-''

Ok so here's what you'll need:

1) whole corn kernel/sweet corn kernel (approx. 14-16oz)
2) sweet corn cream style (approx. 14-16oz)
3) brown sugar
4) butter
5) low fat milk


Measurements:

This recipe needs;

1) 14-16oz whole sweet corn kernels
2) 14-16oz cream style sweet corn
3) 3.5 tbsp of brown sugar
4) 1 tsp butter
5) 3/4 - 1 cup of low fat milk

Steps:

1) Heat up the milk.
2) Add the brown sugar.  Stir until dissolve, the milk will turn slighty brown.
3) Add in the butter.  Continue stirring
4) While the milk mixture is simmering, add in the cream corn and stir well (the cream and milk need to be well combined)
5) Now add in the corn kernels (sift through the liquid from the can)
6) Stir until well mixed, lower the heat and cover the lid
7) Occasionally check and stir the dessert.  Once you see that it's already thickened, turn off the heat, leat it cool for a while and the feasting begins!


Friday, August 23, 2013

Recipe: Kek Gula Hangus / Caramalized Burnt Sugar Cake


Ok, kepada anda yg rakus lagi kelaparan dan mengidam benda manis untuk dilahap, meh sini aku kasi resipi yg aku search dan marathon 3 kali buat masa raya haritu..  Marathon bhai!  Sampai nak muntah aku rumah bau gula..  Demm...

Cara aku buat senang.  Tak jumpa hand mixer, tak payah pening pakai blender..  Lantak kau kek nak jadi rupa apa janji bila masuk mulut aku boleh berlagak dan riak akan kesedapannya..  Jadi aku share di tutorial kek gula hangus, tapi versi translation omputih ye..  Nak melayu punya tak de hal, aku kasi link utk explaination yg lagi padu (amboi! padu hokeyh!)


Jadi utk resipe versi aku, jgn blah lagi..baca sampai habis...  hehe 

~~~~~~~~~~~~~~~~~~~~~~

As I told you guys before, I'm going to give you guys a tutorial on making my style of Caramalized burn sugar cake recipe..  Firstly, why is the name so freaking weird like that?  Well, because it's a direct traslation from it's original name which is in my native language..  And the name basically shows your the general steps of making this cake..

Caramalized the sugar--> make it burn a bit (overcooked sugar) --> add in cake bater


*images from google*
 So I did this recipe for our Eid celebration..  I didn't really had any plans to do but when I do, I had 3 days marathon of cake making activity..  

So basically you need:

TOOLS:
1) Blender or handmixer ( I used blender because I can't find my hand mixer)
2) Steamer pan
3) Measuring spoons
4) Flour sieve (optional, but I didn't used it because I'm too lazy to add another tool to wash) 

INGREDIENTS:
*Standard size cake measurement:

1) 1 cup of sugar
(for better flavor use 1/2 cups of brown sugar & 1/2 cup of regular granulated sugar)


2) 1 cup of hot water

3) 2 table spoons of butter
(salted or unsalted is optional)

4) 4 eggs
(for the egg you need to eyeball it a bit, because some eggs are large and some are smaller, so what i did was I put 2 eggs first, blend and see whether i get a cake bater consistence, if it's to thick just add another egg and so on.. Make sure you get cake bater consistency..)

5) 1 cup of sweetened condense milk
(this is optional too, for better taste just use it.. if you don't have this kind of milk just substitute it with 1 cup brown sugar OR granulated sugar) 

6) 1 cup of flour

7) 2 tea sp bicarbonate of soda

8) 1 tea sp vanilla essence

STEP BY STEP BY STEP

1) Caramelizing the sugar...

a) Take a frying pan or any pans, turn the heat on medium low and pour the 1 cup of sugar.. Fry them (dry pan only, no oil needed) and wait until most of the sugar is melted and turns brown a bit..
b) Add 1 cup of water slowly and at the same time keep on whisking the becoming caramel sugar solution. The sugar might harder like A LOT but don't panic, just continue to whisk slowly and later on the harden sugar will start to dissolve in the water.
c) Add 2 table spoons of butter and mix until it became a proper, no sugar grain left sugar solution.
d) Continue to whisk around slowly until your get a dark brownish yellow color solution..once there, quickly turn off the heat because you don't want the solution to cook further. Leave it on the stove of a while..


2) The cake bater...

a) In a blender (or a mixer), put the eggs and blend them until you get light yellow-cream colour
b) Add 1 cup of sweetened condense milk. Blend it again
c) Add the flour and bicarbonate of soda and turn on the blender again.. Make sure they mix well..
d) Pour in the vanilla essence and again, freaking blend like crazy.


3) The magic begins...

a) Add the caramalized sugar (from step 1) into the cake bater..
b) Again, blend the well..be careful not to spill out the bater peeps
c) Take a baking dish, lay with baking paper or cooking spray and pour in all of the bater.
d) Now the mega decision;
i) if you wanted to have the ant nest effects, just leave the bater to ''shape'' for 3-4 hours.
ii) if you hate waiting and don't give a damn how it will turn out to be, just pop into the steamer or oven and wait for it to cook.


4) Cooking options:

For less time consumption:
~ Bake for 60 minuter with 60'C

For moisture (I picked this option)
~ Steam for 1 hour and 45 minutes


Once cooked, leave it to cool like usual and...


LET THE ULTIMATE FEASTING BEGIN!!!


Good Luck :D
*feel free to leave a comment for more info of this recipe*

Monday, July 1, 2013

It's a rice krispies conspiracy

Hello my little eaters!!!  I managed to get some free time to make something and I'm pretty sure you guys kinda had enough with this recipe but never mind, I'll just post it as usual..  I'll just make some reviews and if you guys like it, you can totally use my tutorial..

From the title above I'll show you guys how I made my own vanilla rice krispies..  So basically, I've studied the portions and tutorials from these two amazing youtube channels..

Check out: 


Nowadays , in my country, it's hard to find the chewy rice krispies treats and the only common enough that you can get is the usual rice krispies cereals and the last time I remembered eating the treats is when I was 9 and now I'm freaking 20 (most of the convenient stores near my house stop taking stock for it and I still don't know why)...  What a very loooong period of years without  the good stuff..

Ok ok, I'll stop babbling about the history of food here, so here's what you need:

1) 6 cups of plain RICE KRISPIES CEREAL
2) 6 cups of marshmallows (any sizes you'd prefer)
3) A dash or 1 tablespoon of vanilla extract
4) 3 table spoons of butter
5) (non-stick) cooking sheet or non-stick baking spray
6) any sizes of baking dish 

The steps:

Step 1
~Sauce pan in medium low heat
~Melt butter until slightly brown (but don't burn them!)
~Pour in all 6 cups of marshmallows
~Add a dash of vanilla extract
~Stir like crazy (ok not that crazy, just don't stop stirring) until all the marshmallows are melted


Step 2
~Pour in all 6 cups of rice krispies cereals and keep the stirring going
~ Fold and stir and fold and stir until all the rice krispies are covered with marshmallows

Special tricky part (optional):
To make a little presence of caramel taste, cook them a little bit longer around 3-4 minutes..  As in the pictures below, you can see that the color turned slightly brown and that's the taste and color if you want the caramelized version.


Step 3
~Spray or line your baking dish
~Pour them all and to make them flat, just take a piece of baking sheet and pad down the rice krispies until they turn flat and in shape of the baking dish
~Wait for 15-20 minutes for the to set down and harden, them you may begin feasting!!!

GOOD LUCK!!!!!

Tuesday, June 4, 2013

My 2nd Red & Black Week: A Tragic Romance of a Pie and how a pie monster would eat it


Hey guys

Welcome back to my blog.  For today I would like to share another sweet treats with dark red and black chocolate roses..

Looks like a cake...

But it's not cake..

It's non-bake lime pie!!!! 

Yay!!!!

I wish this is what my wedding cake will look like =.=


Again, I managed to vlog about this recipe I got from Laura Vitale's website but I did substitute some ingredients of the pie that she made..

before that, here's where I get the recipe;

 I cannot find Graham cookies, lime pie and freeze whip topping so I substitute with Marie biscuits, big lime, and whip cream..

Check out my video of how I made the pie :D


I recommend that you cut down the amount of the sweetened condense milk, because I put mine too much and it was freaking sweet that I felt I should hit my head to the wall..  Ok that was dramatic, but seriously cut down the sweetness..

hmm maybe because I don't like anything that is too sweet...

I put some silver edible pearls, just to make it more romantic..hehe


How the roses turned out to be like...


The yummy crust!!!

Finally, how should I eat it??

Like a horrific zombie of course!!!!!


Pie Monstaaaaahhh!!!!!

Feel free to try it and have a nice day <3 nbsp="">

Thanks for reading and viewing

With love;

LADY OF GOTHICA

2eb2019a photo b9e194b3.jpg

Sunday, June 2, 2013

My 2nd Red & Black Week: Can failure turned cake-pops into fudge?


Hi everyone!!! I'm back for this year's Red&Black Week.. Just for information for new readers of my blog, this week theme was created by the goth fashionista, Miss Kitty of Sophistique Noir and the participants just have to create as many entries as they can for the whole week with anything red and black..

The most important thing is to have FUN!

For last year, I did 2 self-shoot fashion model wannabe thingy with my mostly black and mostly red-ish maroon outfits and the following entry, I think I posted out about my jeweleries..

My last year's entries:

For this year I was thinking why don't I make something different and fattening..HAHA! 
 Then I came up with a few ideas and plans to make something that can be considered Red and Black, Zombie-ish, excessive usage of white chocolate, and something delish that probably will give out some ideas for Halloween..

Therefore, for the first day of participation I shall make you guys crave for chocolates like zombies running for braaaaaaaiiiinnnnssss!!!! Muahahaha!

if it's not redish-maroon enough, believe me the food dye really have a talent of making dissapointment :(
Honestly, these Zombified mini cake fudge didn't came into my mind until some epic fail happened while I was dipping my suppose-to be-cakepops in the melted chocolate (it was the saddest 5 seconds of my life T_T)..  My cakepops tend to break off from its stick so I've decided to turn the pops into these mini cakes and I randomly piped the melted white chocolate dyed in maroon to make them looked like squished bloody brains..  

There were lots of technical errors while doing this but I was happy with the outcome because I was so glad that most of friends and families who tried these had a good time..  Well, I can bet that nothing will taste good enough until you put Nutella in it -.-'' haha!


Now it's vlog time!  I managed to vlog the process of making these treats but I edited out the fail part, sorry no bloopers :(

My head was like ''ok think of something!!!'', so decided that;

with sticks = cakeops
no stick = mini cakes that look like fudge 

*sometimes cheater wins*

and I hope you guys enjoy my video :D

If you have any questions regarding the recipe, feel free to ask me :D


Have a nice day 

Thank you so much for reading and viewing

with love,

LADY OF GOTHICA

2eb2019a photo b9e194b3.jpg
This blog belongs to Amirah Y a.k.a Kak Long Wayer